Rivendell uses a system of cue points within audio cuts, referred
to as markers. Markers can be used to specify
a number of parameters for a piece of audio. They are set in the
Edit Markers Dialog. To access the Dialog, open an audio cart,
select the cut to open on the cut list and then touch the
Edit Markers button.
The Dialog is divided into three areas: the waveform area in the
upper half, consisting of the waveform display and
Amplitude and
Time buttons; the transport
controls area in the center, consisting
of Start,
Pause,
Stop and
Loop buttons along with an
audio meter and marker position readouts,
and the bottom section containing the usual
OK and
Cancel buttons.
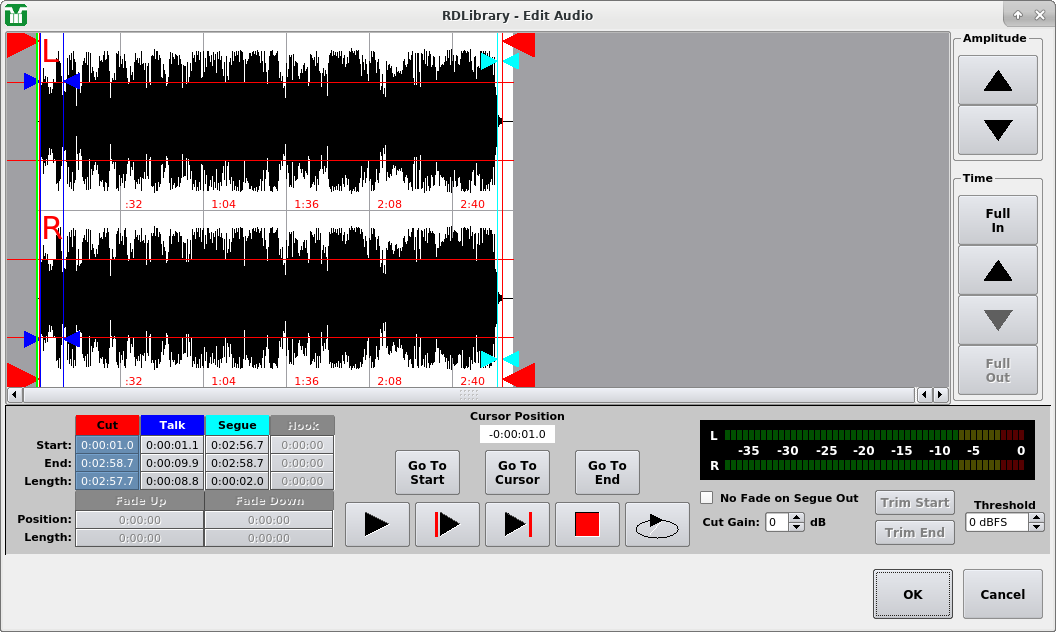 |
The Edit Marker Dialog
It's possible to 'zoom-in' on the waveform in various ways by
clicking the Amplitude
and Time buttons.
By default, the waveform
is displayed fully 'zoomed-out', thus showing the entire length of
the audio cut. The GoTo buttons
can be used to jump directly to
the current play out cursor position, start or end of the waveform.
Audio can be played one of two ways: either by clicking on the
waveform to indicate where play out should start and then clicking
the left-hand Play button,
causing play out to start from the
selected position, or by clicking the center
Play button, which
will cause play out to start from the currently selected start
marker.
Clicking the Loop button will
cause the audio to play out
continuously, looping from end back to start, until either the
Stop,
Save or
Cancel buttons are clicked.
All cuts have Cut markers, used
to indicate the absolute start and end of the cut when played on-air.
To adjust the position of the markers, position the mouse cursor
over one of the arrows on the marker, press and hold the left-hand
mouse button and drag it to the desired location. The marker's
arrows will become larger to indicate that the marker has been
selected.
Additional markers can be set as follows:
-
Fade Down Indicates the point in the cut play-out to begin a steady fade down that will continue until the end
Cutmarker.-
Fade Up Indicates the point in the cut play-out to end a steady fade up that starts at the start
Cutmarker.-
Hook Indicates the portion of the cut to be played by a sound panel when in
Hookmode.-
Segue Indicates the portion of the cut to be overlapped with audio from the following log event when used with a
SEGUEtransition in rdairplay(1).-
Talk Indicates the start and end points of the "Pie Widget" talk timer when the cut is played in rdairplay(1).
To add a marker, position the mouse cursor on the waveform, press the right-hand button and select the desired marker from the pop-up menu. Once added, a marker can be repositioned in the usual way.
To delete a marker, position the mouse cursor on one of the marker's
arrows, press the right-hand button and select
Delete Marker from the pop-up menu.
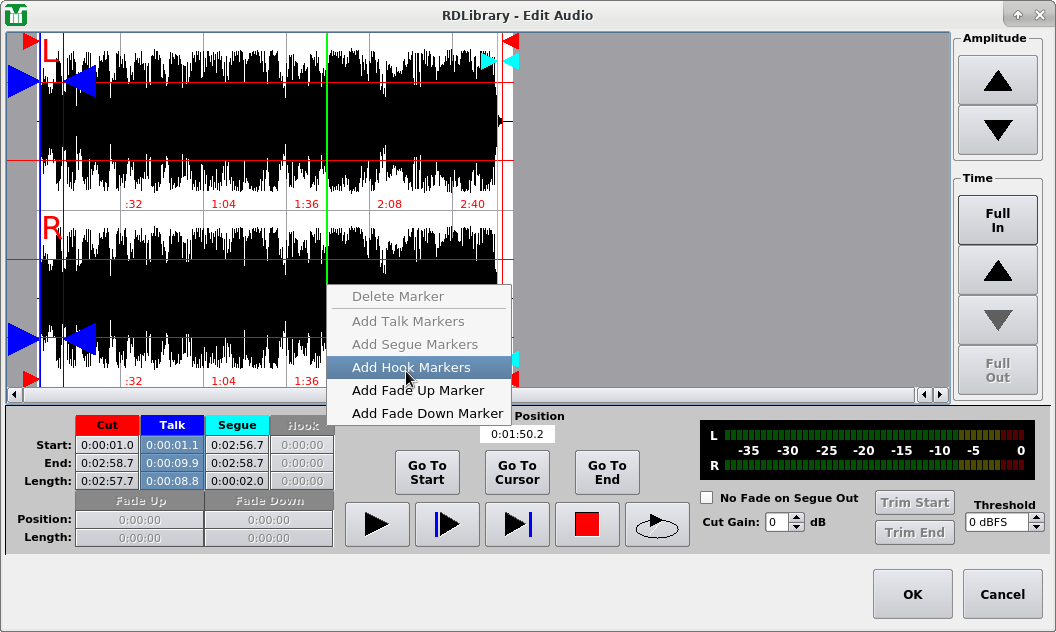 |
The Marker Menu
It's possible to make copies of an existing audio cut on the system
by opening up the cut's parent cart in the Edit Cart Dialog,
selecting it on the cut list and clicking the
Copy button. To
paste the copied audio, simply select the desired destination
cut (within the same cart or a different one) and press
Paste.