An RDLogManager clock is a collection of RDLogManager events, arranged in terms of their start time (relative to the beginning of the hour) and length. It basically can be thought of as the "schedule" of an hour – any hour. Once defined, a clock can be plugged into any hour of a grid of any service, thus making for easy modularization and changes to a service's schedule.
To see the list of available clocks, touch the
Edit Clocks button in
RDLogManager's Main Menu to open the Log Clocks dialog.
Each RDLogManager clock can be assigned a
three-letter code and color, as an aid in identifying it when
assigned to grids. To add a new clock, touch the
Add button, or to
edit a clock's parameters, click on it and touch the
Edit button.
In each case, the Edit Clock dialog will open.
Clocks can also be deleted by touching the
Delete button or renamed
by touching the Rename button.
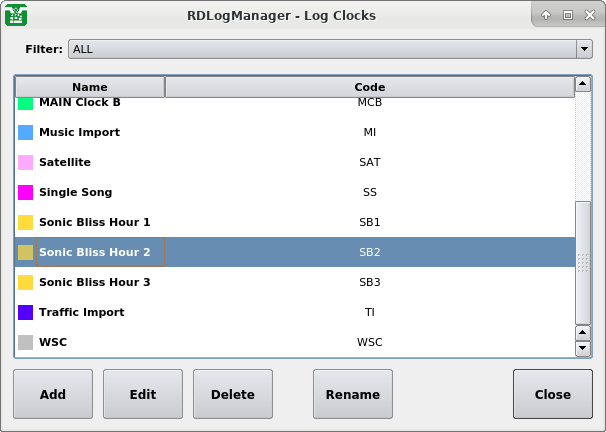 |
The Log Clock List Dialog
 |
The Edit Clock Dialog
The Edit Clock dialog consists of three main sections: a tabular
list of events in chronological order, a graphical depiction of the
clock in the traditional “broadcast clock” format, and a series of
action buttons across the bottom. The clock's three-letter code is
set by means of the Code field
in the upper right-hand corner of the
table area. Its color can be set by touching the
Color button. To
save the clock without exiting the dialog, touch the
Save
or Save As
buttons. To add a new event to the clock, touch the
Add button, or
to edit an existing entry touch the
Edit button. In either case,
the Edit Event Assignment dialog will open. To
delete an entry, touch the Delete
button. As in the case of grids,
it is possible to 'drill down' into the underlying RDLogManager
event by right-clicking on the respective entry in the clock event
table and selecting Edit Event.
 |
The Edit Event Assignment Dialog
The Edit Event Assignment dialog simply consists of an
Event field
for the name of the RDLogManager event and
Start Time and
End Time
fields for the start and end times relative to the start of the
hour. A list of available events can be brought up by touching the
Select button to bring up the
Log Events dialog.
Each clock can be designated as being associated with one or more
services. This can make finding the correct clock for a given
service much faster, as the
Filter control on the List Clocks
dialog can then be used. To program these associations, touch the
Services List button in the Edit
Clock dialog to bring up the Service
Associations dialog.
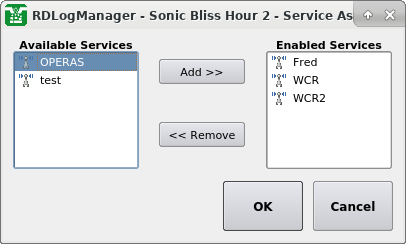 |
The Service Association Dialog
To designate a service as being valid for this clock, select the
services name in the Available Services
list and then touch the Add >>
button. Likewise, to deselect a service, select its name in the
Enabled Services list and then touch
the << Remove button.