In addition to manually recording material in realtime, RDLibrary supports two alternative methods for audio ingestion:
- Importing from a File
- Ripping from a CD
To import audio from a file directly into a cut, we start by
opening the cut's parent cart in the Edit Cart Dialog. Next,
touch the cut's entry in the cut list and then touch the
Import/Export button to open the
Import/Export Audio Dialog.
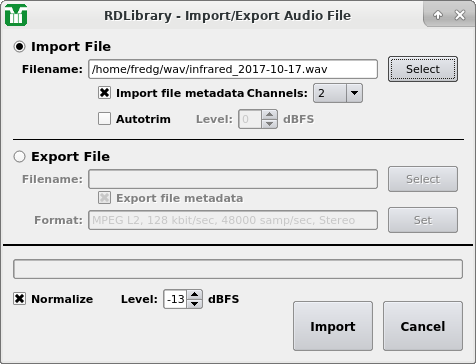 |
The Import/Export Audio Dialog
Select the file you wish to import, either by entering the path
and filename to it in the Filename
field or by clicking the Select
button to open a file browsing dialog. Rivendell is capable of
importing the following types of audio files:
- Microsoft WAV (*.wav) – PCM16, PCM24 and MPEG are supported
- MPEG (*.mp1, *.mp2, *.mp3)
- OggVorbis (*.ogg)
- Free Lossless Audio Codec [FLAC] (*.flac)
Next, set the Channels drop-down
menu to the appropriate number of
channels. You may also wish to adjust the
Normalize or
Autotrim
controls, although these will normally be set to reasonable default
values by the system administrator and should seldom have to be
altered. If Normalize is selected,
then the imported audio will
be peak normalized to the level indicated. The
Autotrim does the
same thing as in the Record Dialog (see section 2.0.1.2, 'Recording
and Auditioning a Cut in the Record Dialog' above for details).
Finally, touch the Import button.
A progress bar will indicate
percentage completion of the import, followed by a popup box to
announce completion. The Import Audio Dialog will automatically
close after acknowledging completion. The audio is now imported,
and can now be auditioned and otherwise processed in the usual way.
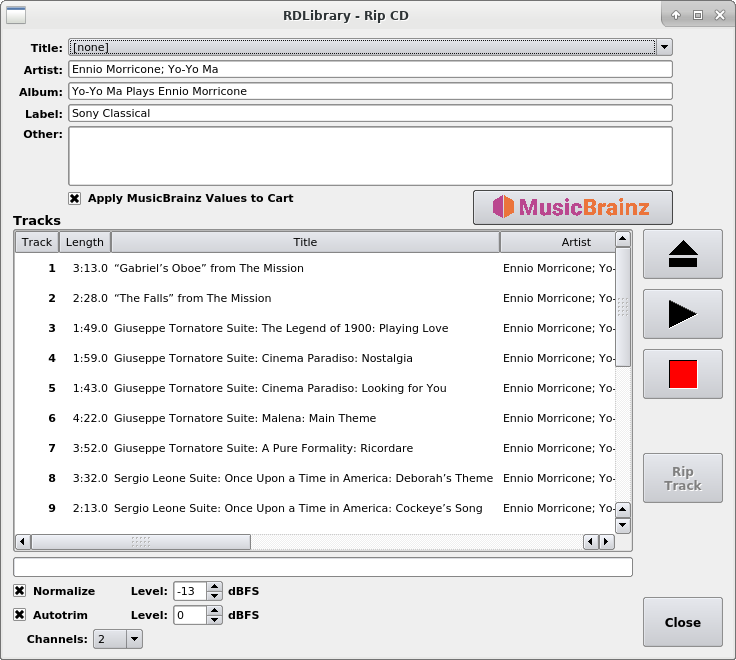
To rip audio directly off of a CD into a cut, we again start by
opening the cut's parent cart in the Edit Cart Dialog. Next,
select the cut's by touching the cut's entry in the cut list,
and then touch the Rip button
to open the Rip CD Dialog.
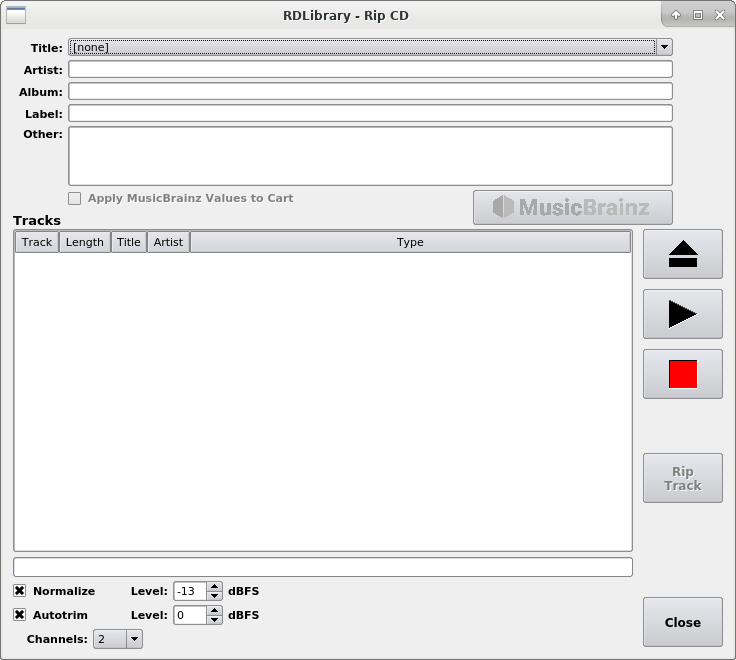 |
The Rip CD Dialog
Load a CD into the CD drive. After a few seconds, list of tracks should appear in the Tracks area. If the system administrator has enabled it, the system will attempt to locate a record for the disc at the MusicBranz.org music encyclopedia. If it finds a record there, the disc title and track information will be populated automatically.
 |
A typical MusicBrainz lookup
Note
It's possible that a disc will match more than one MusicBrainz record, in which case the system will present a dialog asking you to select the actual disc being used.
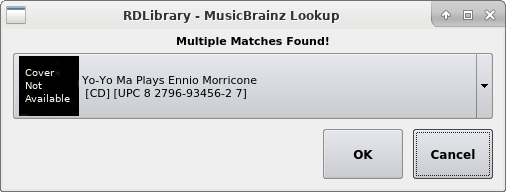 |
The MusicBrainz Multiple Matches Dialog
If this occurs, select one or more entries from the dropdown list
and then touch OK. If more than
one track is selected, the selected tracks will be seamlessly
concatenated together in the target cut.
Set the Channels,
Normalize and
Autotrim controls appropriately (see
Section 3.2.1, “Importing Audio from a File”
for details on using the
Normalize and
Autotrim
controls). Next, touch the track you wish to rip and then press
the Rip Track button. The track will
now be ripped into the cut,
with a progress bar keeping you informed of progress. When the
rip is complete, a message box will pop up to inform you of this.
If MusicBrainz data was found for the CD, you can have that
information automatically be placed on the cart label
for the cart by ticking the
Apply MusicBrainz Values to Cart
box before closing the Dialog.
Sometimes, when transferring multiple audio tracks from CD,
it's more convenient to be able to set up the entire transfer at
once and then let the rip run in a 'batch' mode. RDLibrary is
capable of ripping audio in this manner as well. To do this, click
the Rip CD button near the bottom of
the main RDLibrary screen, bringing up the Rip Disk Dialog.
 |
The Rip Disk Dialog
This dialog is similar in many ways to the Rip CD Dialog described
above, except that each track or range of tracks can be assigned to
ripped to a different cut by double clicking on its listing or
selecting the desired tracks, touching the listing and then the
Set Cart/Cut button, bringing up
the Select Cart/Cut Dialog. It's also possible to create a new
cart automatically for each selected set of tracks by touching the
Add Cart Per Track or
Add Single Cart buttons.
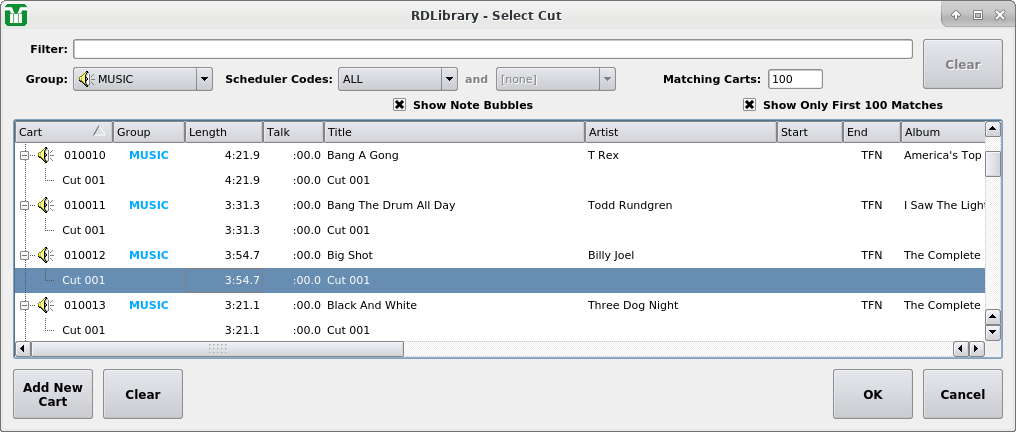 |
The Set Cart/Cut Dialog
Select the desired cut to rip to and then touch the
OK button, or create a new,
empty cart/cut by touching the
Add New Cart button.
The complete set of library filtering tools are
available to you here – see
Section 3.4, “Navigating the Audio Library”
for details on their function, just as in the main RDLibrary
screen.
Once all of the desired tracks have been assigned to cuts, be sure
that the Normalize,
Autotrim,
Channels and
Apply FreeDB Values to Cart
controls have been set as desired, then click the
Rip Disk
button. A set of progress bars will keep you informed of the
progress of each track, as well as overall progress. When, the
rip is finished, a message box will let you know.